Ans. Airdrop is the fastest way to transfer images and files from an iPhone to a Mac.
How to Transfer Photos From iPhone to PC? (Windows and Mac)
Updated On June 23, 2026
Apple offers an ecosystem that makes transferring files quite easy from one device to another. An issue arises when a Windows or other operating system device gets into the ecosystem, causing a disruption in file sharing and management.
So if you own a Windows PC or just bought a new Mac, you might be wondering how to transfer photos from iPhone to PC.
Whether you’re using a desktop computer, laptop, Mac, or another smartphone, you have several ways to move photos quickly and safely between devices.
Well, you have landed at the right place, and here’s the detailed walkthrough on transferring iPhone photos to PC.
Quickest Method to Transfer iPhone Photos to PC (Windows)
If you own a Windows PC, currently, there are 4 ways to transfer photos from an iPhone:
| Methods | Usage | Speed | Best Used Case |
| USB Cable | Easy/Moderate | Medium | Large photos |
| Google Drive | Easy | Medium | Large photos |
| iCloud | Easy | Fast | Automatic syncing |
| Intel Unison | Easy | Fast | Files and photos |
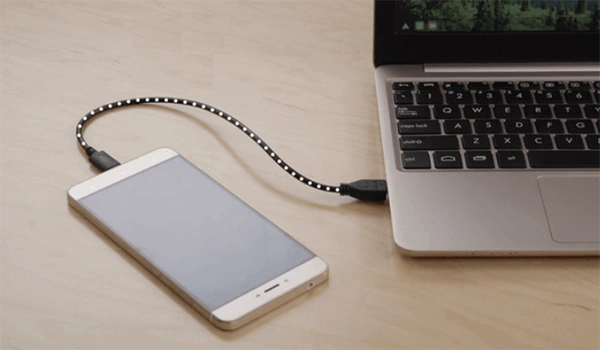
Transferring files via USB Cable has been the long-rooted method since the emergence of [smartphones](https://devicefixes.com/smartphone/), and this still works with iPhones.
It remains one of the most reliable options for file management across PCs and laptops and is often preferred when handling large photo libraries or performing data recovery.
With a USB cable, there are multiple ways to transfer photos from iPhone to PC, here’s the different ways to execute the transfer process.
File Explorer
File Explorer allows you to directly access your iPhone’s photo storage and manually copy images to your computer.
How to copy photos from iPhone to PC using File Explorer:
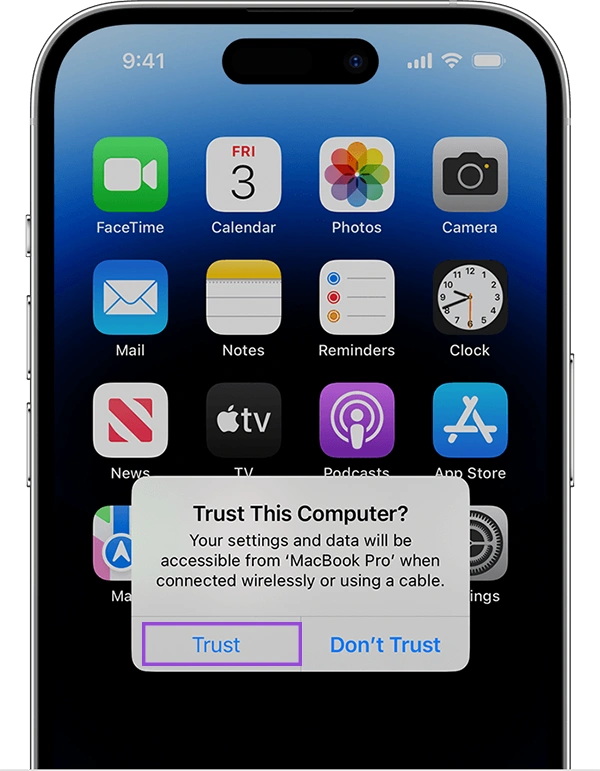
- Connect your iPhone to your PC using a Lightning or USB-C cable.
- Unlock your iPhone.
- Tap Trust from the options if prompted on your iPhone.
- Open File Explorer on your Windows PC.
- Select Apple iPhone under “This PC.”
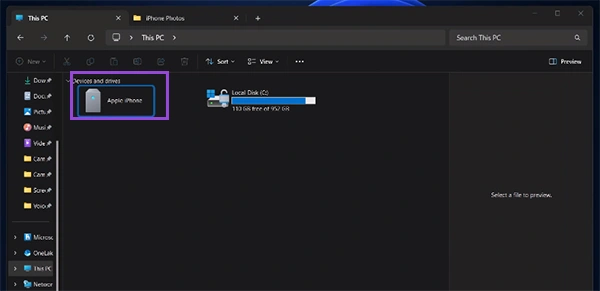
- Open the Internal Storage folder.
- Navigate to the interal storage folder.
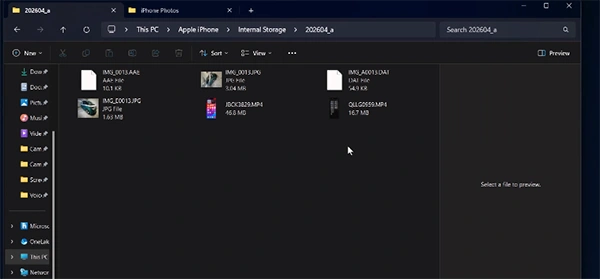
- Select the photos you want to transfer.
Copy and paste them into a folder on your computer for easy backup and future data recovery if files are accidentally deleted.
This was the swift method to import iPhone images to PC now, let’s move on to other USB transfer methods.
Windows Photos App
This one is a more seamless method as it automatically streamlines the placement of images. Moreover, an organized way to copy iPhone images to a PC.
- Connect your iPhone to your PC.
- Unlock the device, and you will get the “Trust This Computer” prompt on the iPhone. Click on “Trust.”
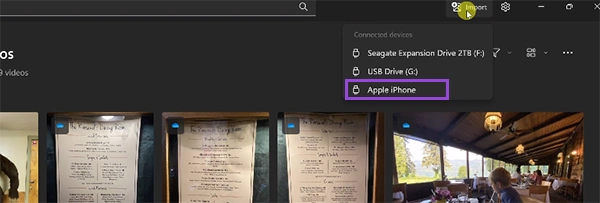
- Open the Photos App on Windows.
- Navigate to the top right corner and click “Import.”

- Select the “Connected Device” and choose your iPhone.
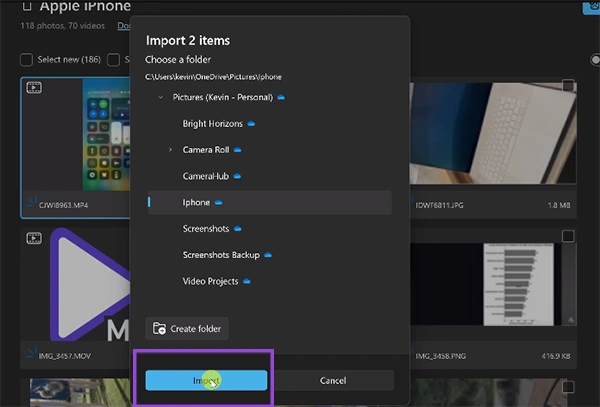
- Select the photos you want to transfer to your PC and choose the destination folder.
- Click “Import.”
The method is more filtered and simplifies how to import photos from an iPhone to a PC and organize them perfectly.
iTunes Method
Using iTunes is surely an obsolete method, but still quite useful for transferring images.
All you have to do is simply connect your iPhone and follow the methods below:
- Make sure you have the latest version of iTunes on your PC.
- Open iTunes and sign in via your Apple ID.

- Unlock your iPhone and click on Trust as you will receive a prompt for “Trust This PC.”
- You will also get a pop-up on your PC that says “Allow This Computer to Access,” click on “Continue.”

- At the top left corner, click on the phone icon >> Photos.
- Press “Sync” at the bottom of the page.
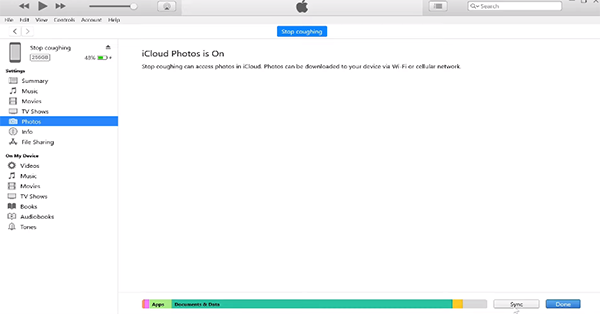
In some cases, the device may not be able to sync the photos. All you need to do is turn off iCloud sync on your iPhone, plug out and in your cable, and this should work.
Using a cable connection offers you a swift way to transfer a bunch of images and videos without any strenuous efforts and makes it quick.
With these steps, your misconception about how to transfer photos from iPhone to PC might be clear. Now, let’s move to the wireless method in case your port isn’t compatible with C-type.
Method 2: Google Drive
This one is surely the smartest method to truly access your iPhone images and trap deer deer to a Windows PC.
Simply download the Google Drive from the App Store and log in via your Google ID that is present on your PC.
- Create the folder if you want to organize your images, then click on + icon to import all the images or videos.
- Tap upload and select the photos and video.
- Click on “Upload” in the top right corner.
Once the upload process is done, you need to redirect to your PC and open your Google Drive using the same account.
Navigate to the folder or a particular image and click on the three dots, or what we refer to as the kebab menu.
Click on “Download,” and the files will be imported to your PC with a .zip file. Simply extract the folder, and you are good to go.
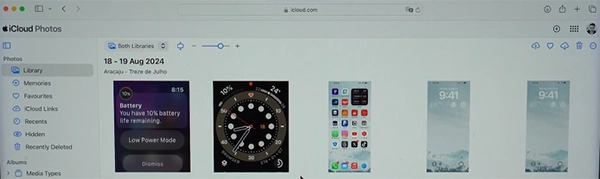
Method 3: iCloud
Another seamless way to wirelessly transfer iPhone images to a PC is by leveraging the capabilities of iCloud.
If you are a user who is paying for iCloud, this method is the fastest way to access your images and videos.
- Simply download iCloud from the Microsoft Store or go to iCloud.com.
- Login your Apple ID, and in the top right corner, click on the Quick Access section, and click on that.

- Navigate to the Photos section, and all the photos and videos that are stored on your iCloud will be accessed
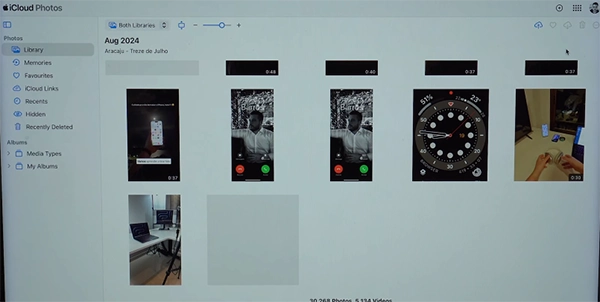
- Select the picture or video you want to download and click on the cloud icon with the downward arrow button.
This method is not functional if you aren’t using iCloud services and truly want to rely on something more that is seamless.
As of now, we have the last and probably the best wireless method to transfer files from iPhone to PC.
Method 4: Intel Unison (Third-Party Application)
A perfect way around if you have cable issues and truly want to make the transfer quicker. There are tons of third-party applications you can leverage to transfer iPhone photos to a Windows PC, and in this example, we will be using Intel Unison, the most popular alternative.
- Download and install Intel Unison on your Windows PC from the Microsoft Store.
- Also, download the application on your iPhone device.
- Open the application on both devices simultaneously and scan the QR code displayed on the PC.

- Grant the necessary permission and click on the send button.
- Select the gallery and choose the images you want to transfer to your PC.

The selected images will be displayed on the Intel Unison dashboard in just a few seconds. And this was the fastest and simplest way to copy iPhone photos to a PC.
This was the complete coverage on how to transfer iPhone images to PC Windows, now let’s move on to the ecosystem of Apple, which is the effortless method of all.
Also Read: How to Copy and Paste on Mac? 8 Must-Use Methods for Mac Users
How to Transfer iPhone Images on Mac?
One advantage of having a Mac and an iPhone is that you get an ecosystem that makes transferring much smoother, thanks to the Airdrop feature.
- Open the Photos App on your iPhone and select the images you want to transfer.
- Tap on the Share button and choose AirDrop.

- Make sure that on your Mac, your AirDrop is on for everyone to allow it to be discovered by your iPhone.
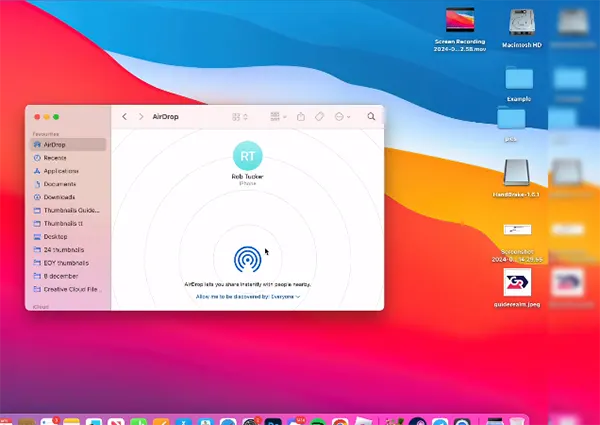
- Select the Mac from the available devices and accept the transfer on your MacBook.
This is the perfect method to rely on for sending fewer photos across devices. However, in case the amount of photos and videos is quite high, or you own an older version of iPhone without AirDrop, then moving to the cable method will be the best option.
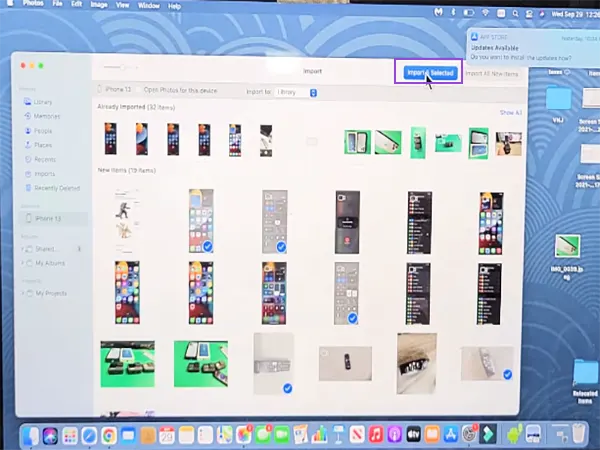
To transfer a photo from iPhone to Mac, first connect your device with a C-type or Lightning cable.
- Unlock your iPhone and tap on Trust This Computer if it’s your first time.
- On your Mac device, open the Photos app and select the iPhone under the devices.
- Choose the photos you want to import.
- You can import the selected files or simply import all the photos.
And this will automatically organize your photos on your device. You can also use the iCloud method, but that won’t be required unless you don’t have a compatible cable or own an older iPhone at the same time.
But again, if you haven’t really paid for the iCloud services, this method is still somewhat obsolete. In that case, using a third-party application like Intel Unison is the best option to get things done.
Best iPhone Photo Transfer and Management Tips
You might be transferring photos for multiple purposes, either to clear the phone storage or to create a backup.
Here are some necessary tips you should incorporate for better management.
- Whenever possible, try transferring images via cable to your Windows PC to procure the image quality.
- Make sure your iPhone photos are in HEIF format to maintain the quality and keep the size reduced.
- For Apple devices to use AirDrop.
- Make sure you have synced all the photos, videos, and files to iCloud or Google Drive to safeguard against theft, damage, and accidental deletion.
- Regularly check your gallery and photos, and make sure unwanted photos and screenshots are being deleted to free up space.
Conclusion
So next time, if you get confused on how to transfer iPhone images to PC for both PC and Mac, you know where to get the answer.
With this article, the myth about compatibility and the Apple ecosystem might be clear to you. In terms of maintaining the quality of image capture by an iPhone, going with the right transfer process will highly impact the quality.
Read Next: Does Apple Pencil Work on iPhone? Compatibility & Best Alternatives
FAQs
Q1. From Apple to Mac, which is the fastest way to transfer?
Q2. What are my photos in iPhone in HEIC format?
Ans. HEIC refers to High Efficiency Image Container, which is the default file type for images. Compared to .jpg, it consumes less storage and keeps the image quality high.
Q3. Can I transfer live photos?
Ans. Yes, you can transfer live photos from an iPhone via Airdrop, iCloud, and the Windows Photo app.
Q4. For transferring large files, which method is the best?
Ans. To transfer large files using a USB Cable transfer would need the most sophisticated and seamless method.
Q5. Why is my iPhone not showing in File Explorer?
Ans. This happens because you haven’t enabled the Trust This PC prompt when you would have plugged in for the first time. Disconnect and unlock your iPhone again, and this time click on Trust This PC.
Sources:
Transfer photos and videos from iPhone toMac or PC – Apple Support