Crossing paths with frustrating situations like printer disconnections or incomplete setup can be very tiring, especially when you are already on the edge of chaos in your office or school.
Well, these types of scenarios are easily avoidable if you learn how to add printer to Mac both wirelessly and using USB ports precisely, so that your work won’t be hindered anymore. Here we have listed some crucial methods that you must check out for fostering a seamless connection and mitigating systematic pitfalls.
There are some important parameters that you need to ensure to attain the best connection between your system and printers. Consider them carefully before starting the connection process:
Ensure that your printer is powered on and plugged in properly.
Check that the printer is connected to the same WiFi as your PC (in most cases, they should be connected to 2.4 GHz to avoid frequent disconnections)
Make sure that macOS is completely updated with the necessary software version updates and security patches to mitigate the incursions of existing bugs and glitches.
Always have Mac-supported USB cables in your bag in case you have to connect the printer with wired solutions.
If you install any third-party drivers, then remember admin passwords.
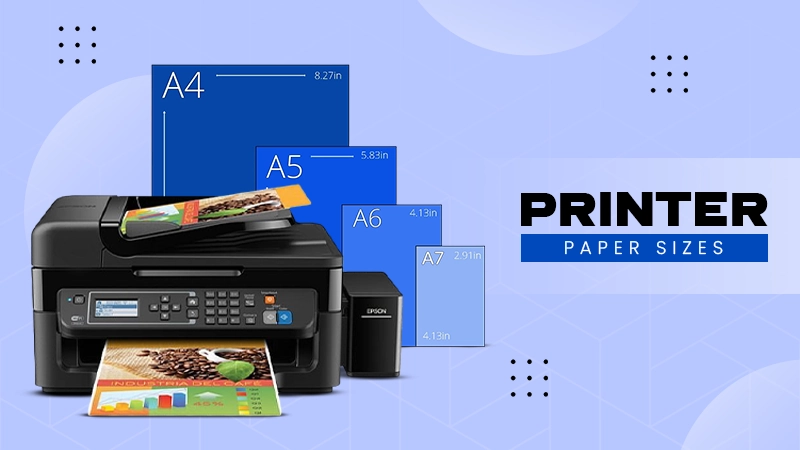
Always attach the recommended printer paper sizes to your printers for accurate and mess-free prints.
Method 1: Add a Printer via USB (Wired Connection)
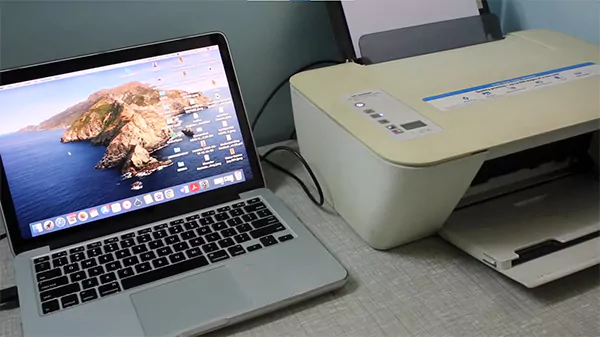
Connecting a printer to a MacBook using your USB cable is the easiest process, as it can be done in three easy steps. But first, make sure to have a USB-A to USB-A cable with you because it helps in faster data transfer and stable connectivity. Now, if you have one, then follow the easy steps given below:
Connect your MacBook and printer with USB-A ports.
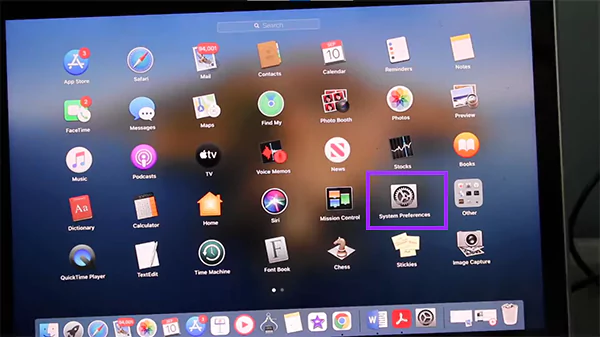
Now go to System Preferences.
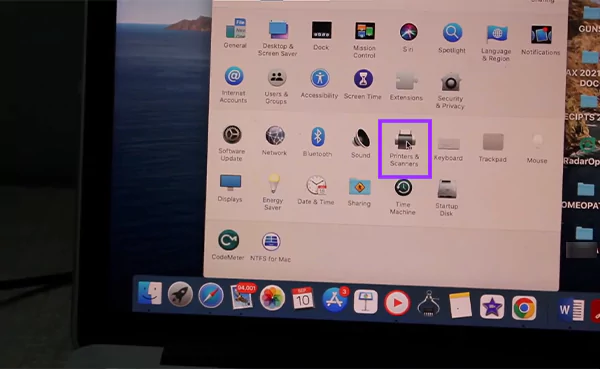
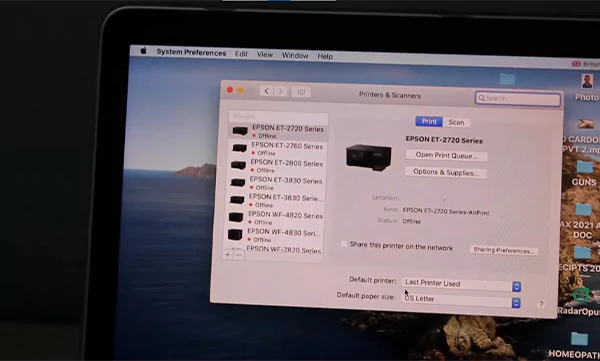
Click on Printers and Scanners.
Your system will configure and detect your printing device; now you are ready to print.
To add a printer wirelessly, the first thing that you need to do is to connect your printer to the same WiFi as your MacBook (2.4GHz is suggested in most of the printing work). The for establishing the connection, follow the steps given below:
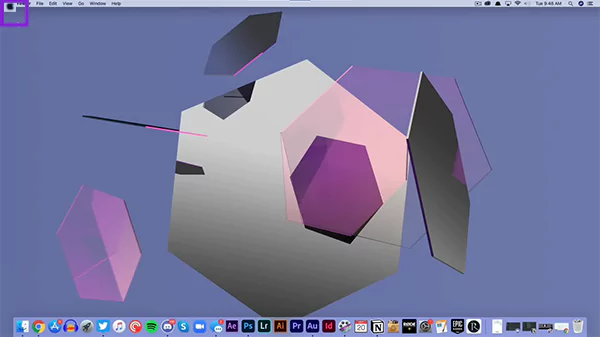
Open MacBook and click on the Apple logo.
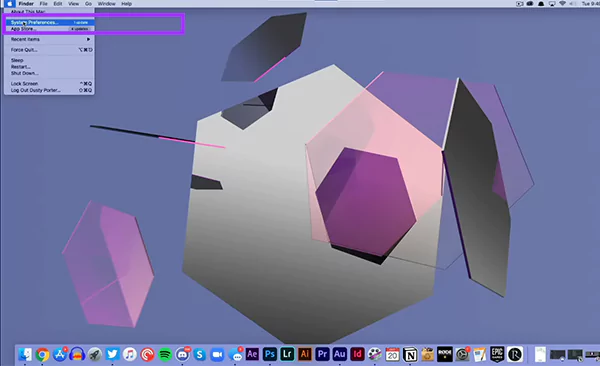
Then click on System Preferences.
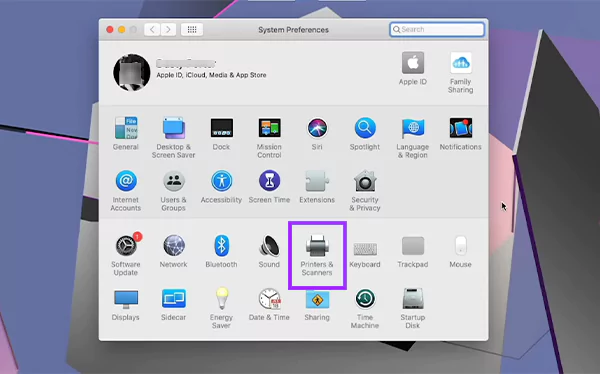
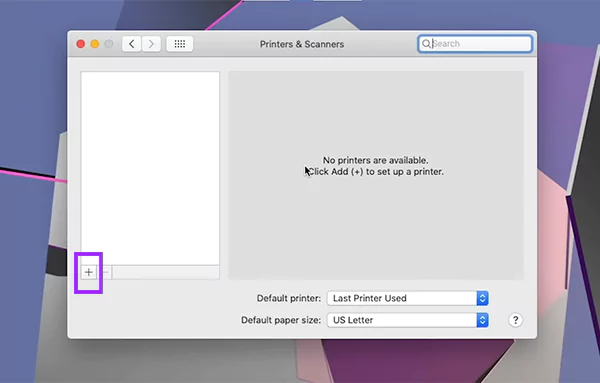
Click on Printers and Scanners.
After that, click on the plus (“+”) icon.
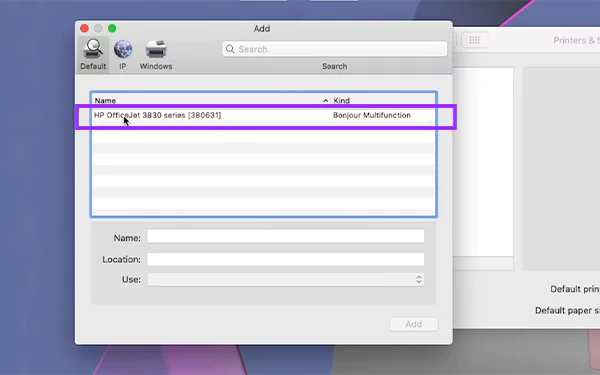
Click on the available printers (all the printers connected with the same WiFi as the MacBook will show up).
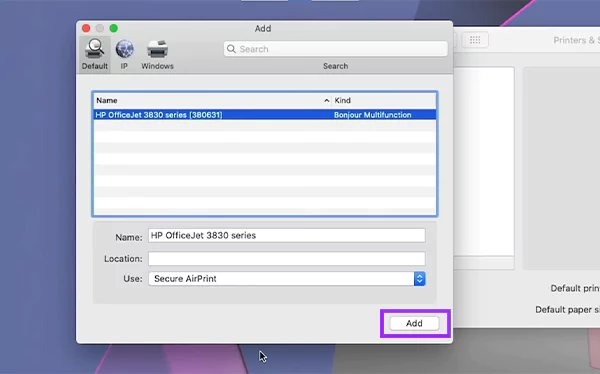
After a few seconds of scanning, it will show an option to add. Click on it
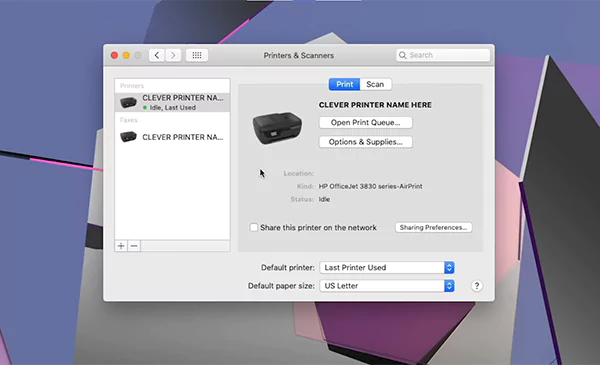
Your printer is finally connected.
Method 3: Add Printer via IP Address (Network/Office Printers) — 180–200 words
Sometimes you are working at a different place and need to print pages asap, but how likely they are connected to different networks but there is still a way where you can connect your MacBook and carry out your work in a few simple steps.
Open MacBook and click on the Apple logo.
Then click on System Preferences.
Click on Printers and Scanners.
After that, click on the plus (“+”) icon.
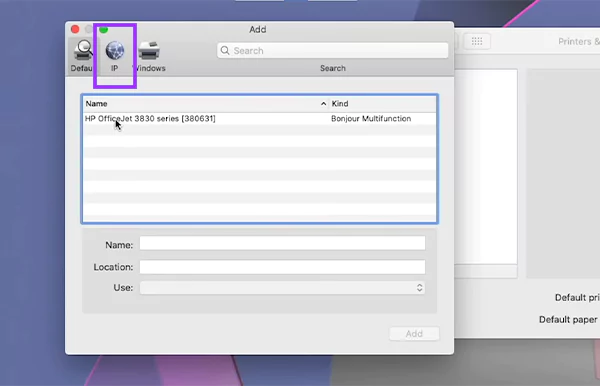
Click on the IP button.
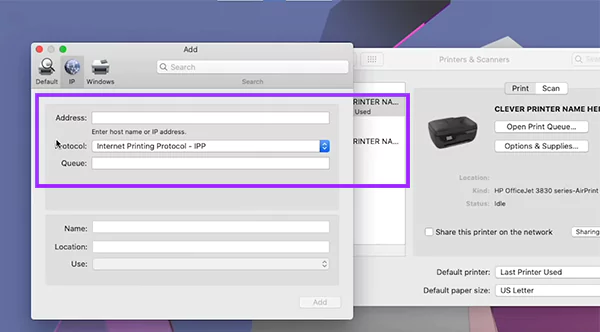
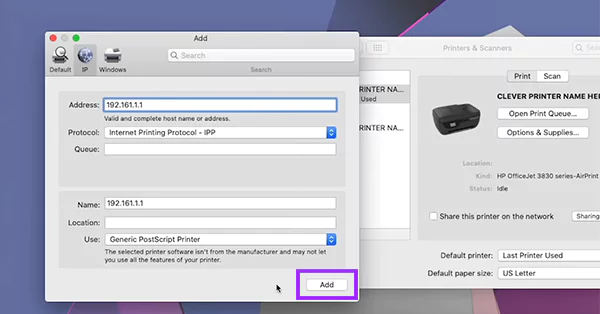
Then manually type the hostname, address, and location mentioned in the printer device.
Then, after entering all the details, click on Add.
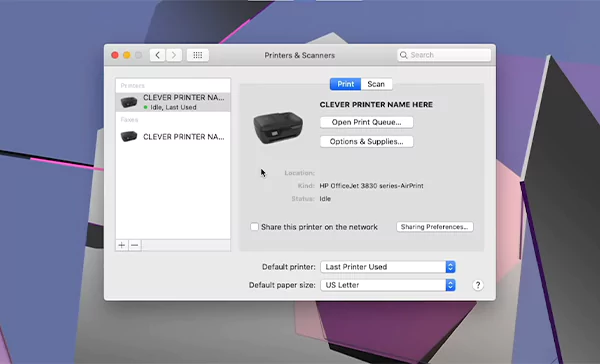
Lastly, after doing all of this, the printer will be connected.
Pairing a Bluetooth Printer
Lastly, if these two methods are unavailable, there is still a way to connect your HP printer (or any brand or model) to a MacBook using Bluetooth drivers. In some older generations of printers, there is an option to enable Bluetooth connectivity between two devices. You can easily connect those types of printers by enabling Bluetooth on your MacBook and printer simultaneously and start taking out prints as usual.
In this entire process, there is a possibility that some common issues can occur and won’t let you establish a stable connection, and they mostly occur due to inconsistencies in WiFi connections, cables, or system hardware failures. But they can be easily resolved using some troubleshooting methods mentioned in the chart below:
Issue
Troubleshooting methods
Printer not showing up in the list at all.
Well, this can happen if your printer is not connected to the same Wi-Fi as the PC. The best way to fix it is to ensure streamline and recommended network connection between both devices
“Filter failure”
This error usually occurs on macOS devices due to some wreckage in drivers or software calibration. You can reset the printing system to fix this issue.
Driver conflicts.
At times, it happens when you update your MacBook with the latest macOS updates; the printing drivers become unstable or do not connect with your PC. All you can do is restart the printer or wait for another update so that the problem-causing bugs and glitches are removed.
The printer shows “offline” even when powered on.
This issue is considered more like a system glitch rather than a hardware problem. A system can fix this problem in most cases. If the problem persists, then run system diagnostics on Mac or look for printer repair services in your area.
Slow printing or blank pages.
Slow printing or no output happens when you overload the spoolers by commanding highly quality images. This issue can be easily fixed if you reduce the quality of printing and refill the ink components as per the advisory.
FAQs
Q1: How do I add a printer to my Mac without the installation disc?
Ans: If you want to add a printer to your Mac without any installation disc, then simply follow these steps for easy navigation:
Apple Menu- System Settings- Printers and scanners- Add Printer, Scanner, or Fax- Then select the available models-Click Add.
Q2: Why won’t my Mac find my printer?
Ans: Well, this can happen for so many reasons, like poor wifi connectivity, an unmatched WiFi connection between the system and WiFi, power issues from the printer’s end, etc.
Q3: Can I add a printer to Mac without WiFi?
Yes, there are ways to add a printer to a Mac without WiFi using technologies like USB drivers and Bluetooth.
Q4: How do I remove or reset a printer on Mac?
Ans: To remove or reset a printer on Mac, you just need to navigate to the same settings of connection, and after reaching there, you will see an option Remove Printer; just click on it.
Q5: Do I need to download drivers separately for HP/Canon/Epson printers?
Ans: Absolutely not, you don’t need to download drivers separately for different printer brands, as operating systems can identify the categories of printers easily through their configuration.
Q6: How do I print from my Mac to a printer connected to someone else’s computer?
Ans: To do this, first ensure that both devices are connected to the same WiFi, then go to Apple menu > System Settings > Printers & Scanners. Click Add Printer, Scanner, or Fax, and select the shared printer from the network list.
Conclusion
Enabling printer connection with macOS is never easier due to upgrades in modern wireless technologies, which are integrated into machines, and wired access, which provides faster data transfer speeds. Before following any method, first ensure the generation of your printer and its capabilities; after that, start the procedure by checking that both your computer and printer are connected to the same WiFi network.
Follow different procedures according to your preference or situation, and if an error occurs, you can follow some easy troubleshooting solutions like restarting the PC or printer, plugging in and unplugging cables, relaunching drivers, etc. Lastly, if you want to learn more about the dynamics and problem resolution of printing devices, then stick with Devicefixes.